


Perfdog 
Web Client Specification
Updated on: 2023-09-08 17:121.Home
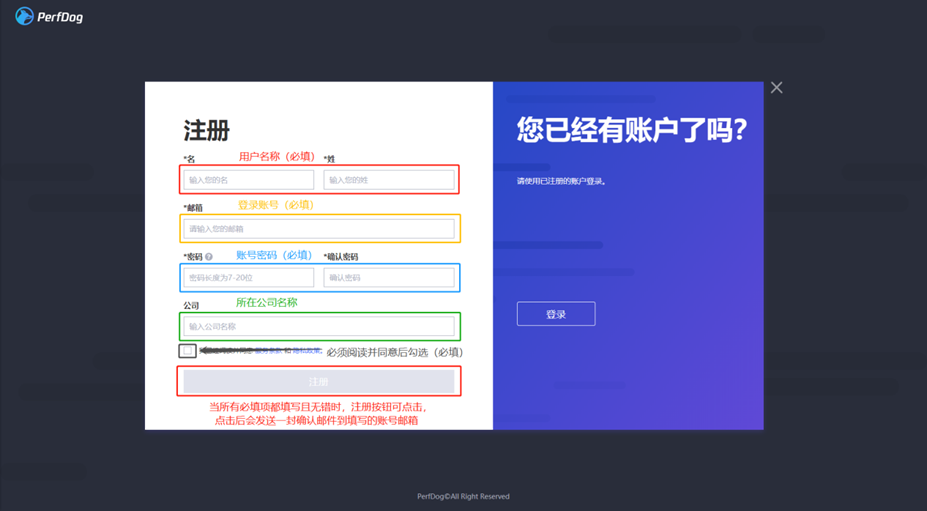
- Register an Account
First log into the official website (https://perfdog.qq.com/) and click Register button:

Enter the account information in the
registration box:
You need to first confirm the information in your email box before logging in (QQ mailbox, for example).

If you cannot click the button in the mailbox, you need to turn off the plain text format in the mailbox settings.

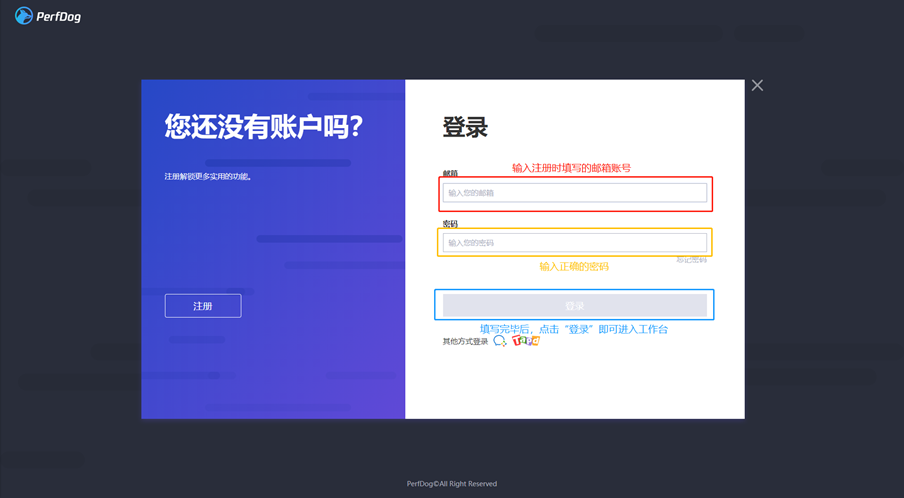
- Log in Account
After registering the account and confirming it in the email box, you can directly use the registered account and password to log in. Then you can directly enter the MyData page or manually enter it.

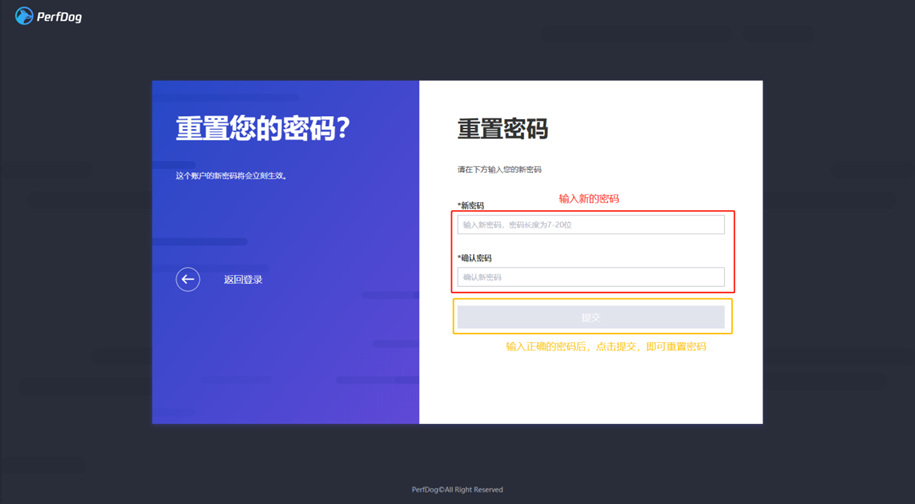
- Reset / Retrieve Password
If the user forgets the login password, he or she can reset it in the login box.
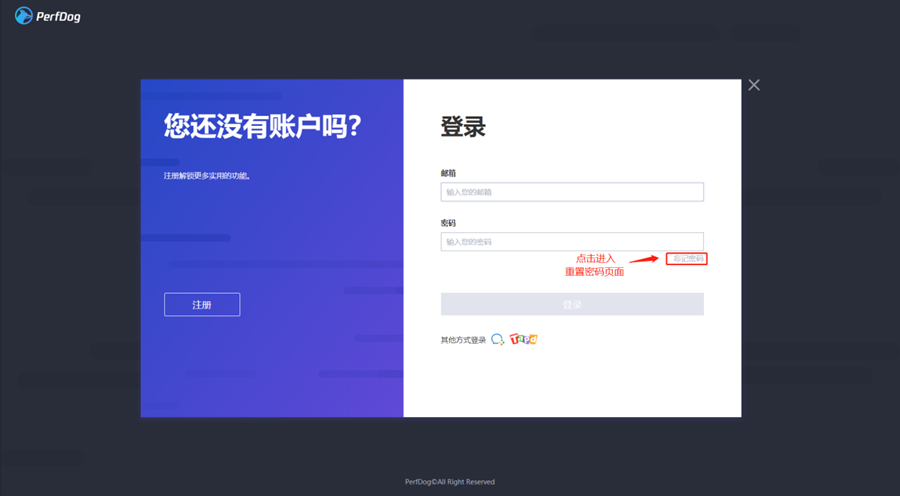
After the account is entered in the
input box, an email will be sent to the email box.

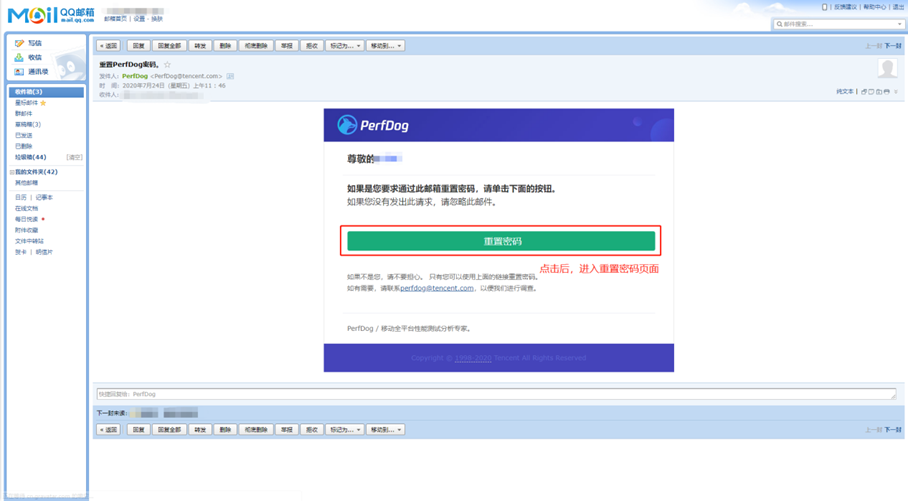
Click the link in the email box, then it will jump to the reset password interface (QQ mailbox, for example).
- Instructions & Community:
There is a link on the top of the official website. It can directly jump to the client instructions and community:

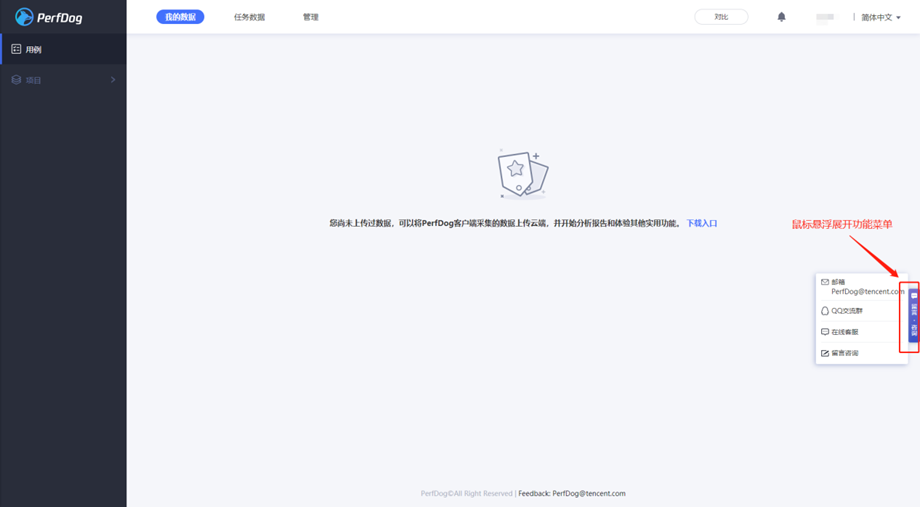
- How to feedback problems & make proposals
There is a feedback channel on the right of the page (you are highly recommended to join the QQ group).

- How to download (only downloadable on computer)
At the bottom of the official website (computer), there are various buttons to download the corresponding systems The user can choose one to download according to the computer system (note: Windows client supports only 64-bit system but not 32-bit system).

WEB workbench (View and Manage Data)
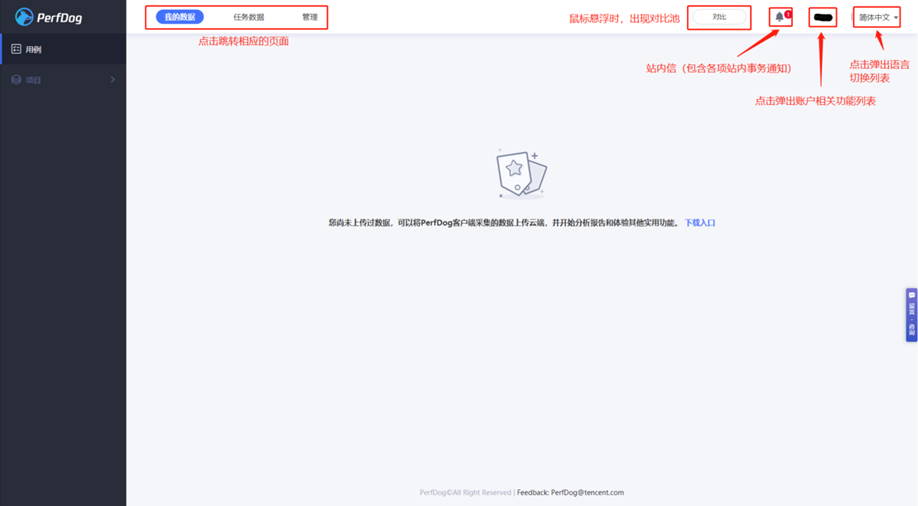
- Top bar
The top bar includes Three Function Page Jump, View Comparison Pool, View Message, Account Function List and Language Switch List:
- How to feed back problems & make comments
The same as the sidebar/s functions on the home page:
3. My Data
3.1. Cases
The Cases page is the collection list of all the cases uploaded by the users (arrayed by the update upload time).
- Query Function
- After a case is uploaded, the query function is available

- Case list and corresponding operation
- Case Archive
- Case Share
- Task Data Permissions
- Project Items
- Create Task
- Invite Member
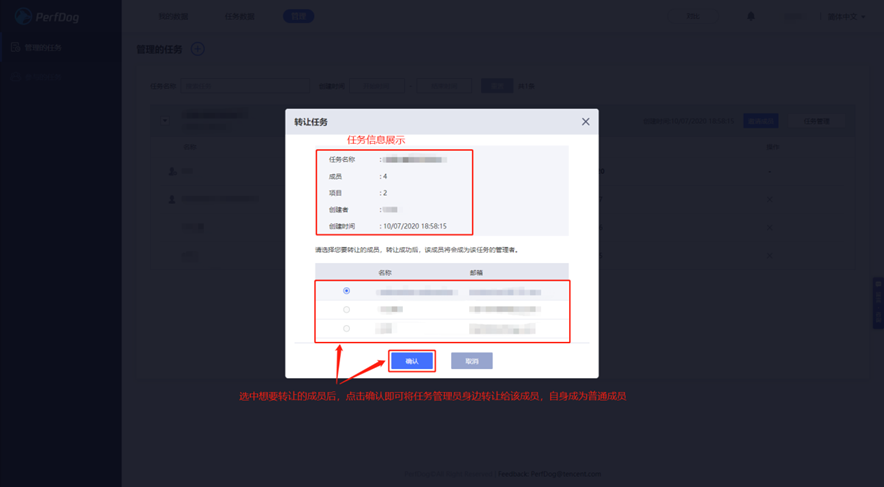
- Transfer Task
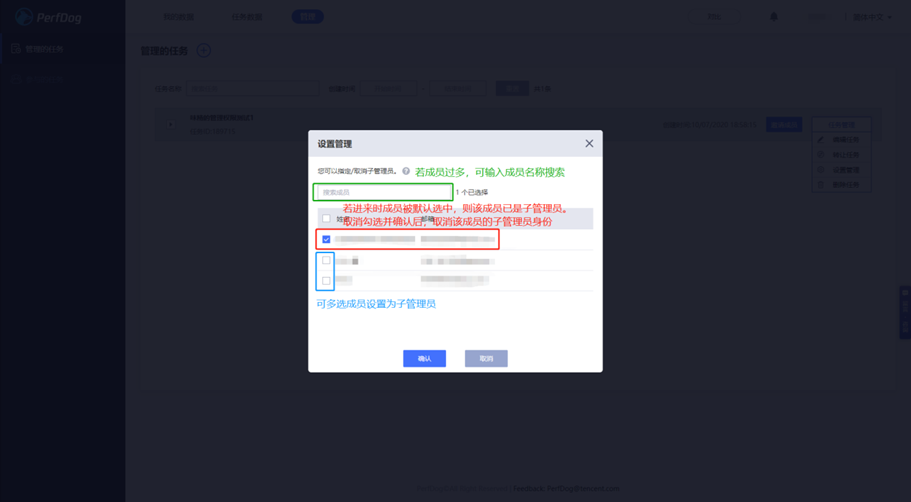
- Set Sub-administrator
- Comparison Pool
- Add Comparison
- Compare Report Page
- Page operation

- Chart Operation (FPS, for example)

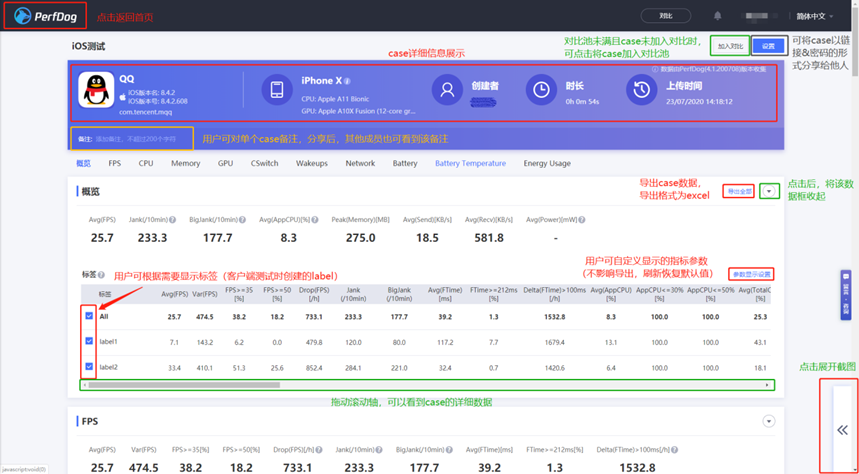
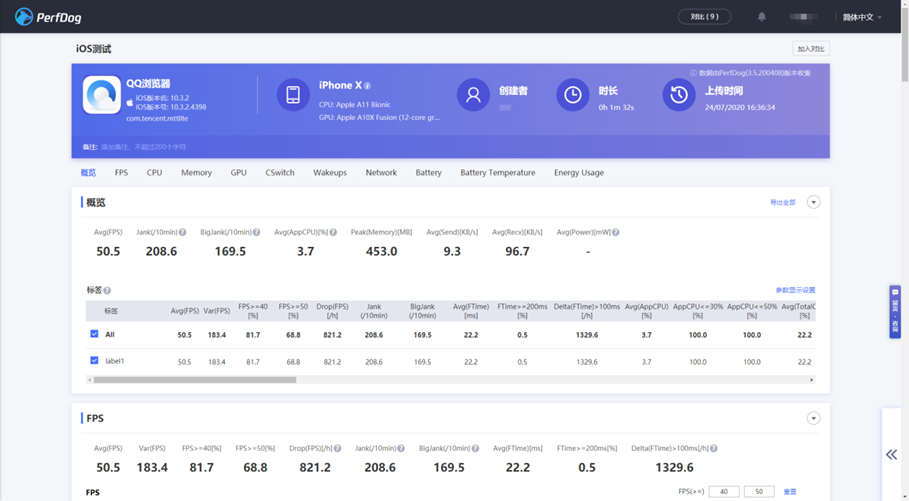
7. Case Report Page (Case)
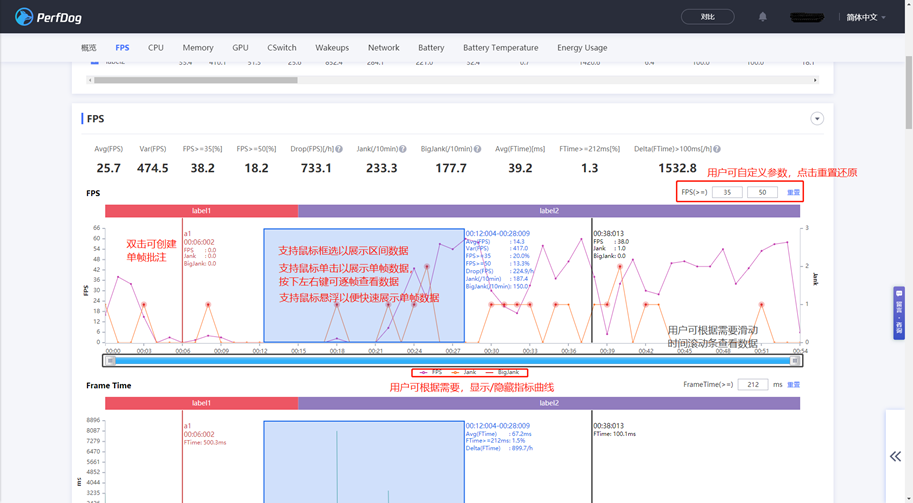
Visualize the test data uploaded by the user in the form of text & curve chart (iOS, for example).
- Page Operation
- Chart Operation (FPS, for example)
- Description of Case Report Page Permissions
- Data Modification
- Invite Function
Cases of other persons:
Administrator: View Case, Rename Case, Add Comparison, Share Case, Delete Selected Data, Add Remark, Increase Selected Data, Export Case Data.
Task Member & Share Member: View Case, Add Comparison, Share Case, Increase Selected Data, Export Case Data.
Self-owned Case:
Administrator & Task Member: View Case, Rename Case, Add Comparison, Share Case, Delete Selected Data, Add Remark, Increase Selected Data, Export Case Data.
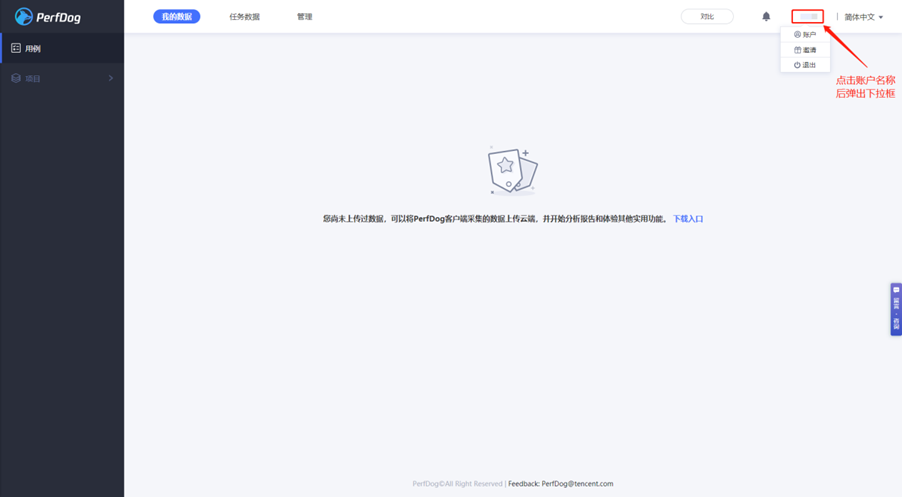
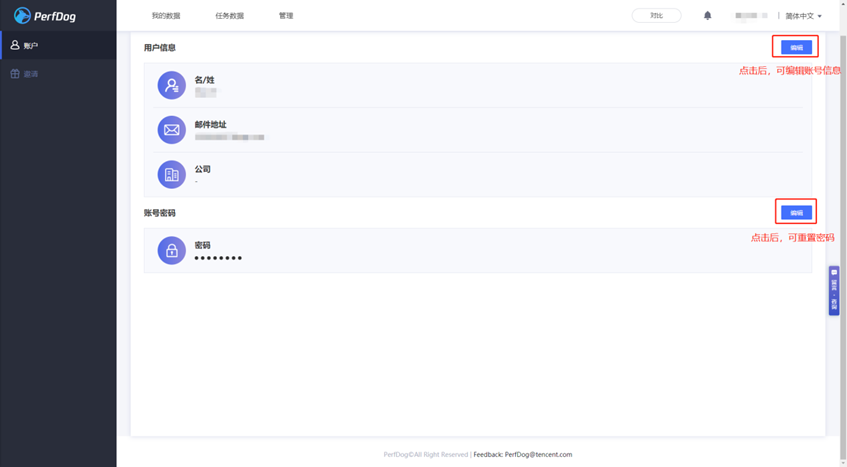
8. Account
The user can enter the page by clicking the account name on the upper right corner.
The user can modify the account name, company and password on the page.
The user can copy its own invitation link to invite other users to register:

9. Notification
The user can click the message icon, then the notification icon to enter the notification system and view all the published notifications.

- Page Operation
If no case is uploaded, the page will prompt the client to test and upload a case:
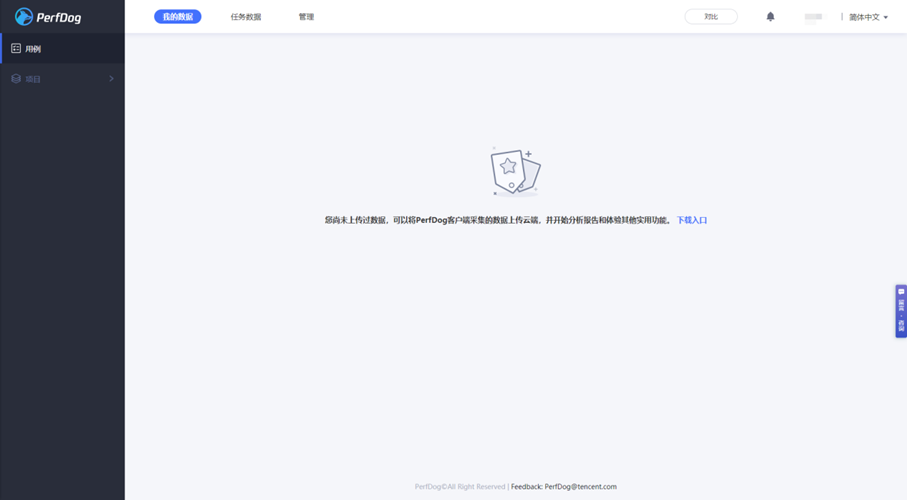
Please refer to PerfDog instructions for how to upload a case from the client:
Chinese version: https://bbs.perfdog.qq.com/article-detail.html?id=5
English version: https://bbs.perfdog.qq.com/article-detail.html?id=7
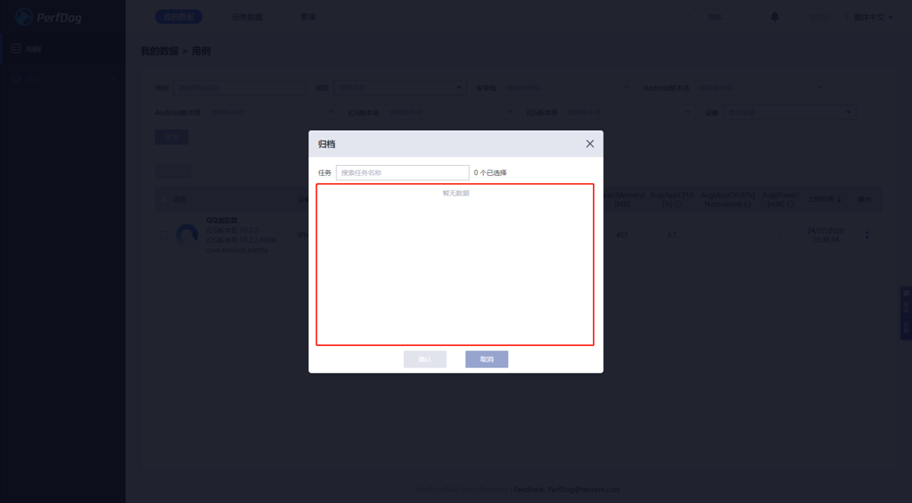
If a case has been uploaded, it can be operated in the case list:

If the user has not managed/added any task, it is impossible to archive a case.
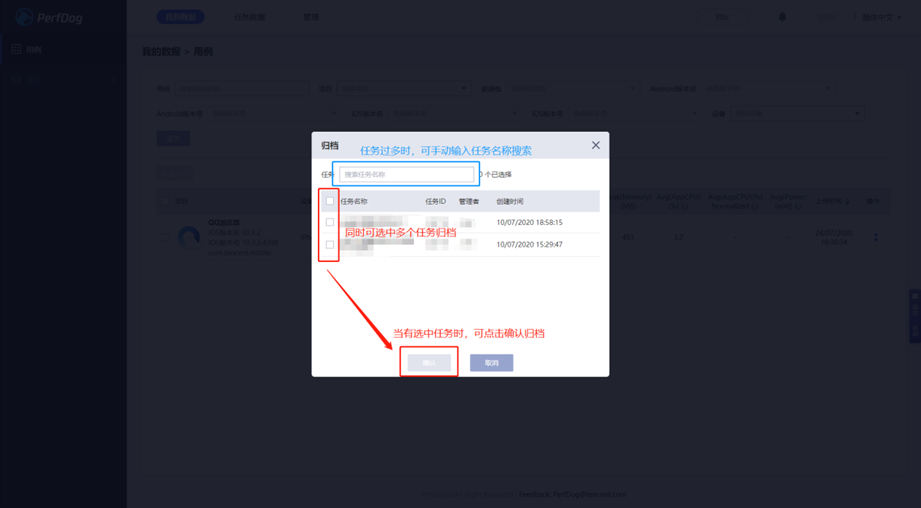
If the user has a task, he or she
can select the task to archive the case:
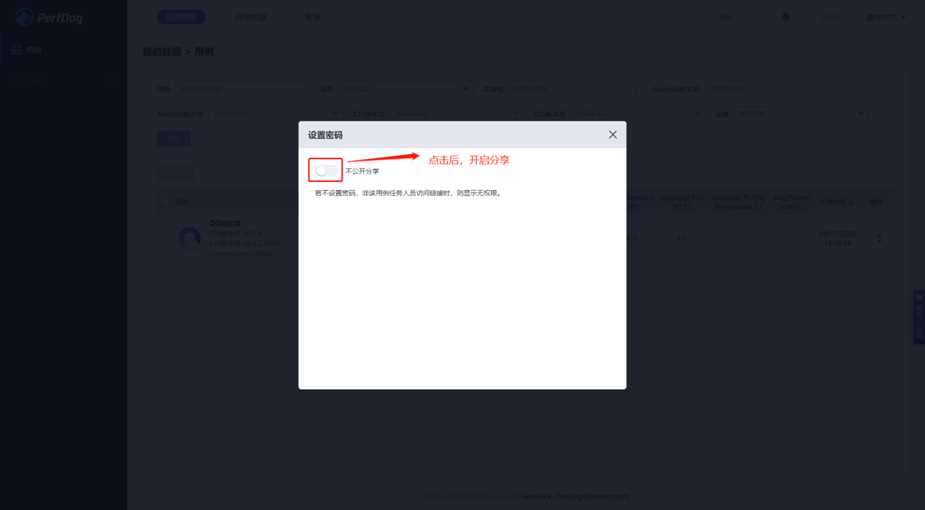
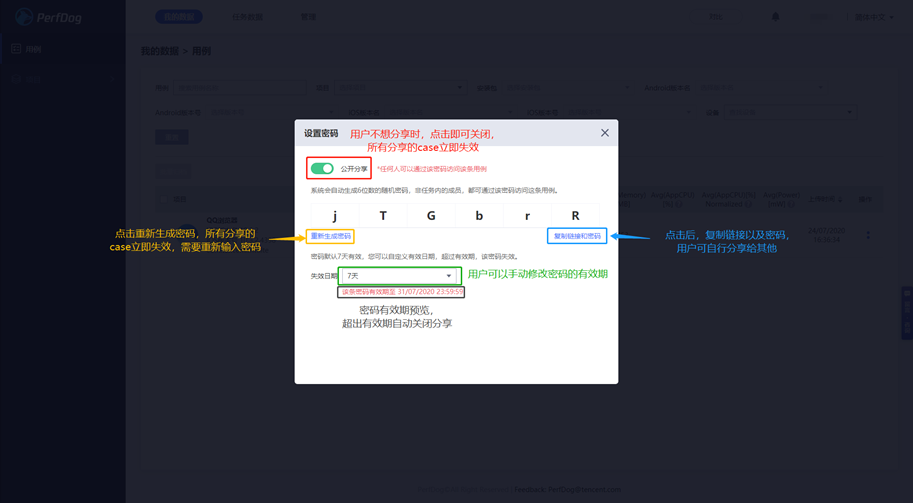
After the user clicks to share, the case report page link and password can be shared with other users.

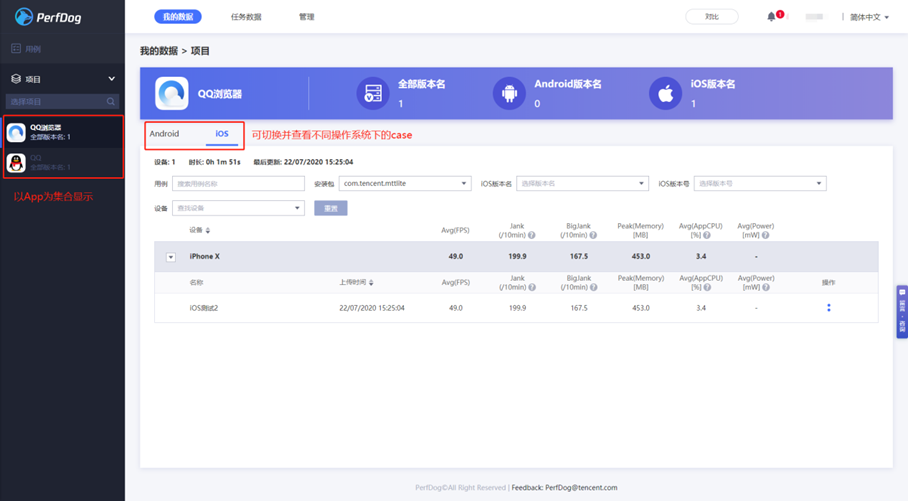
3.2. Projects
The Projects page is to upload all the cases based on the user, use APP as a large collection, distinguish the cases by different operating systems and group them for different devices to demonstrate.
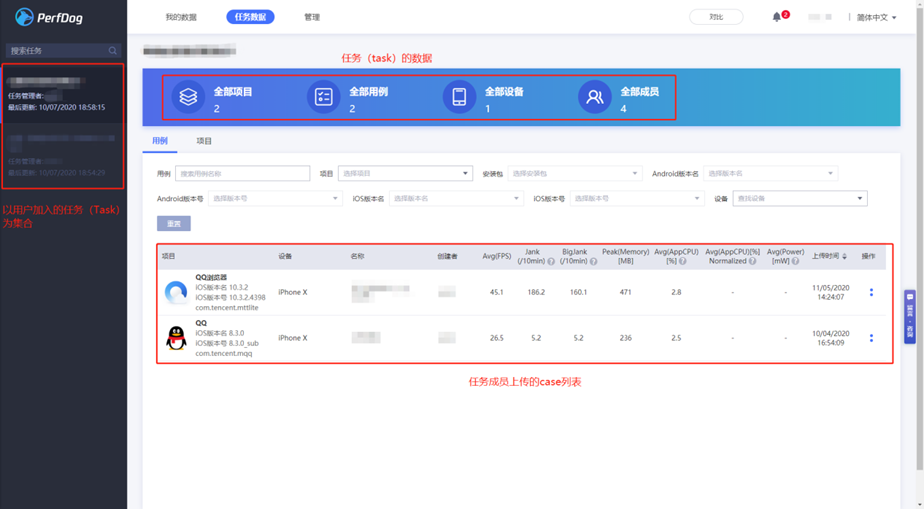
4. Task Data
It demonstrates all the cases archived by the task members with the tasks added by the users as a collection.
Cases archived by other persons:
Administrator: View case, Rename case, Remove case, Add comparison.
Task members: View case, Add comparison.
Cases self-archived:
Administrator & task members: View case, Rename case, Remove case, Delete case, Add comparison.
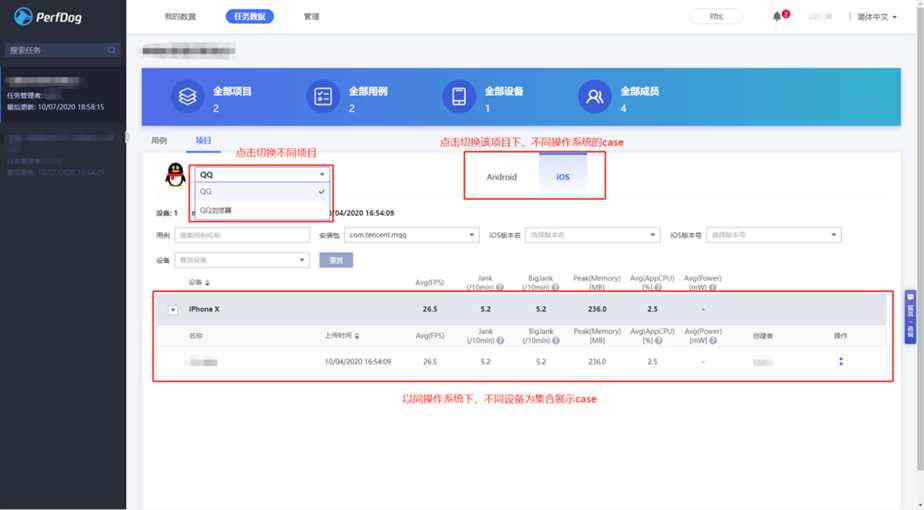
The Items page is to archive all the cases based on the task member, use APP as a large collection, distinguish the cases by different operating systems and group them for different devices to demonstrate. The item switching operation differs from that for My data:
5. Management
5.1. Managed Tasks
Task set with the user as the (sub-)administrator.
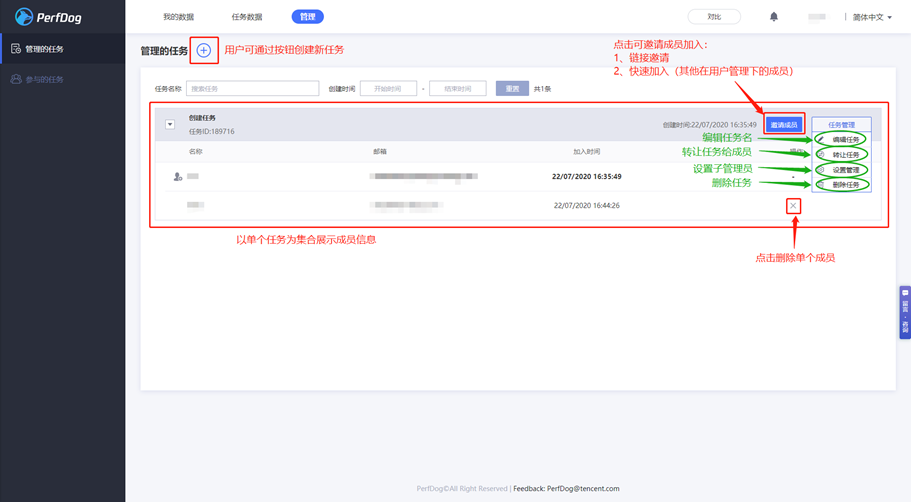
Administrator: Invite Member, Delete Member, Edit Task, Set sub-administrator, Transfer Task, Delete Task
Sub-administrator: Invite Member, Delete Member, Edit Task.
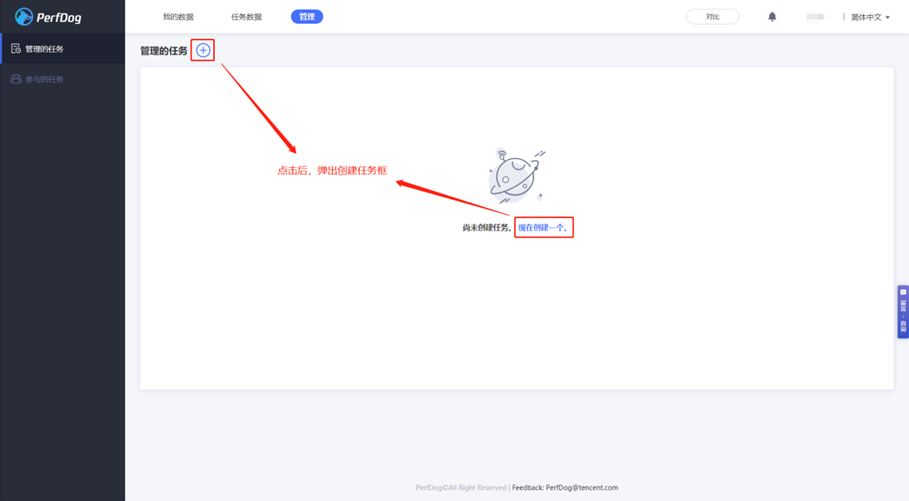
If the user has no managed task, he or she can create one using the text or + symbol on the page.
If the user has a managed task, he or she can create a task using the + symbol on the page.
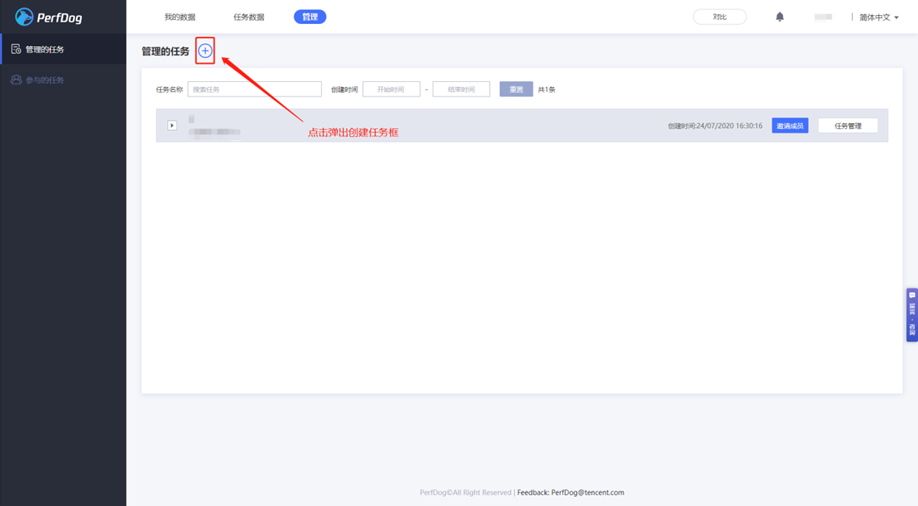
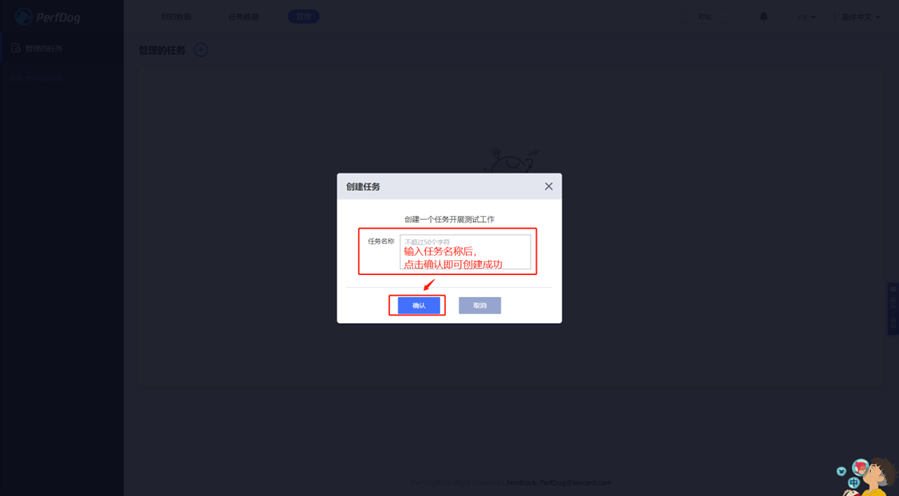
Create Task Box.
The task (sub-)administrator can invite a user to join in two ways.
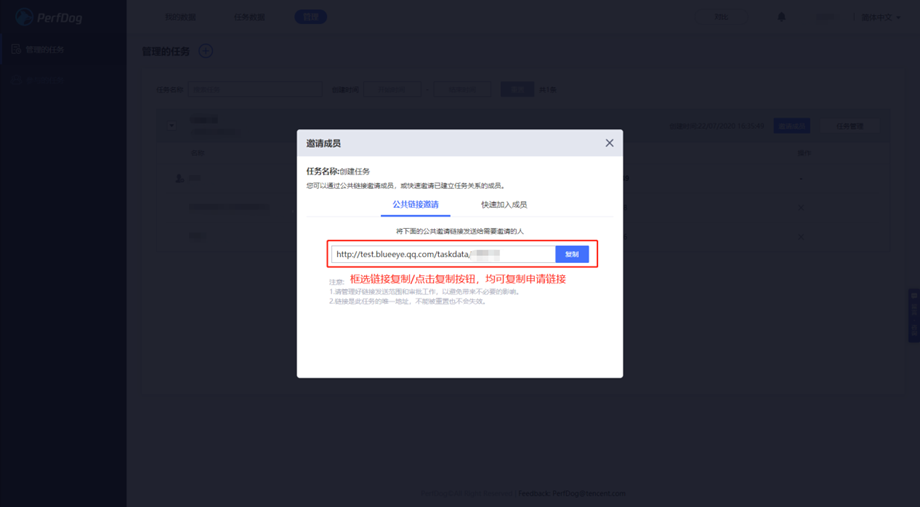
Public Link Invitation:
The (sub-)administrator copies the link and sends it to the user who wants to join the corresponding task.
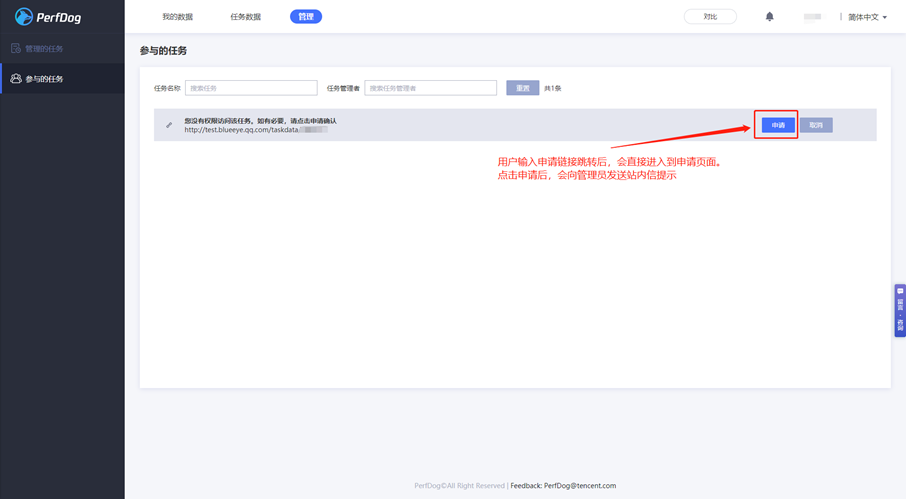
The user can copy the link, jump to the page and submit an application.
The administrator approves the application on the approval page:
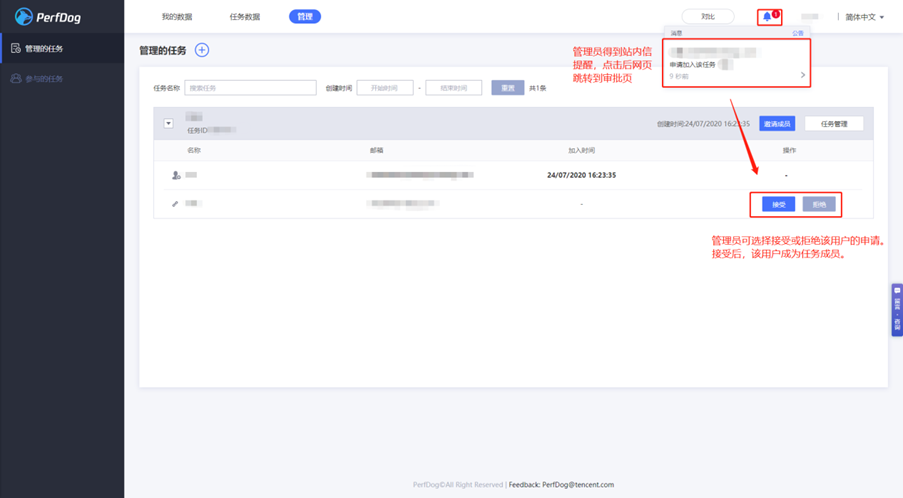
(Note: a user has only five chances to apply for joining the same task)
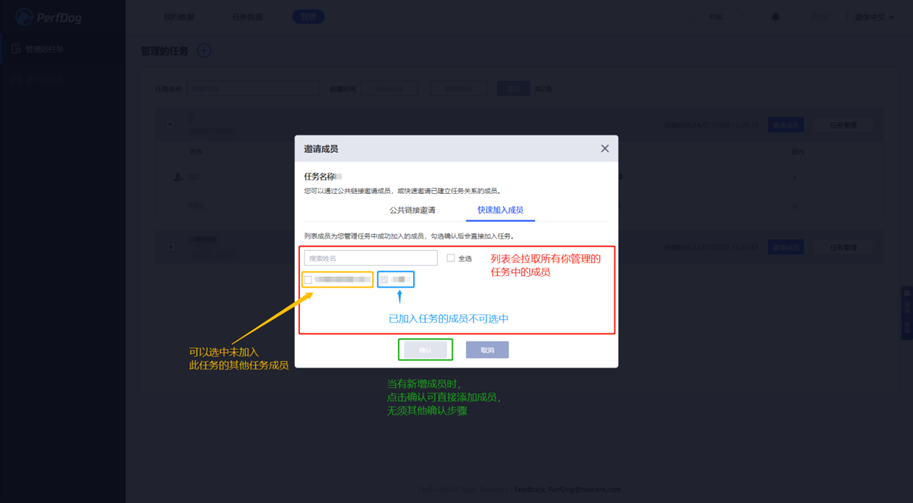
Quick Add Member:
The administrator can transfer his or her administrator role to a task member:
The administrator can set a sub-administrator to assist task management:
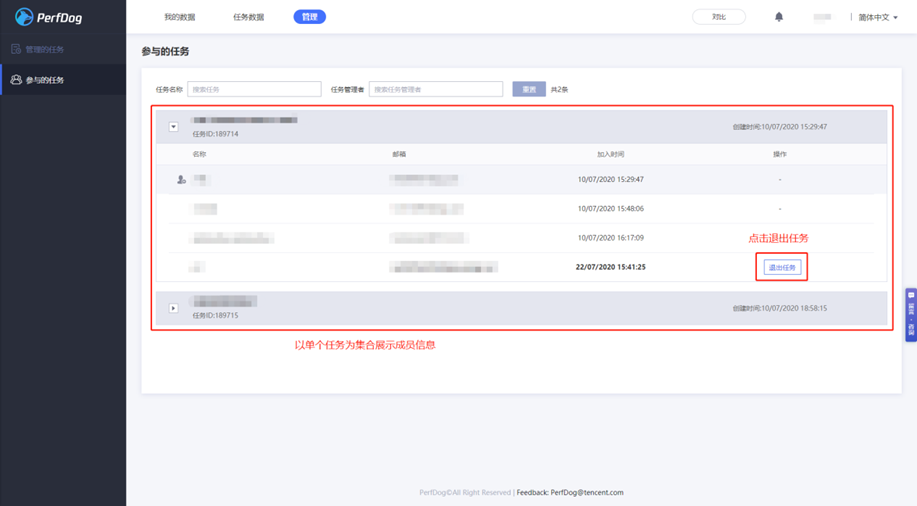
5.2. Joined Tasks
Task set joined by a user as a member.
6. Comparison
The demonstration of the cases (grouped by operating system) selected by a user to compare.
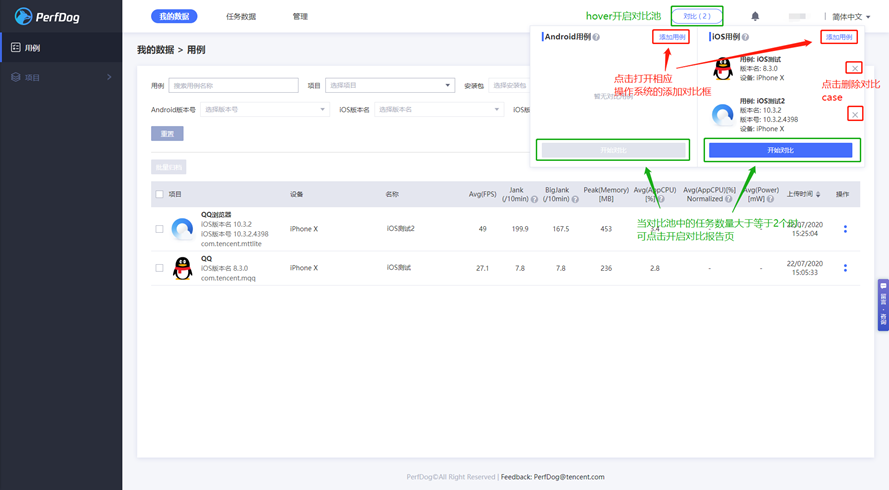
The user uses Add Box to add a comparison case (iOS, for example).
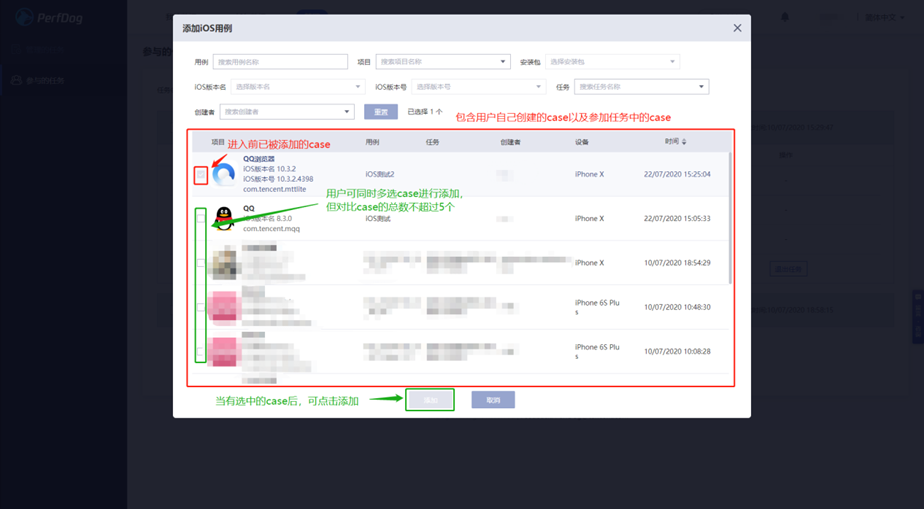
The demonstration of the data of the added comparison cases according to the comparison cases added by the user (iOS, for example).
Next: FAQ